
Brewing a nice cup of Earl Grey tea is the best way to start the day.
But is loose-leaf tea REALLY worth all that extra faff and rigmarole?
Let’s take a look at how to make the perfect cup of loose leaf Earl Grey.
It’s easier than you’d think!
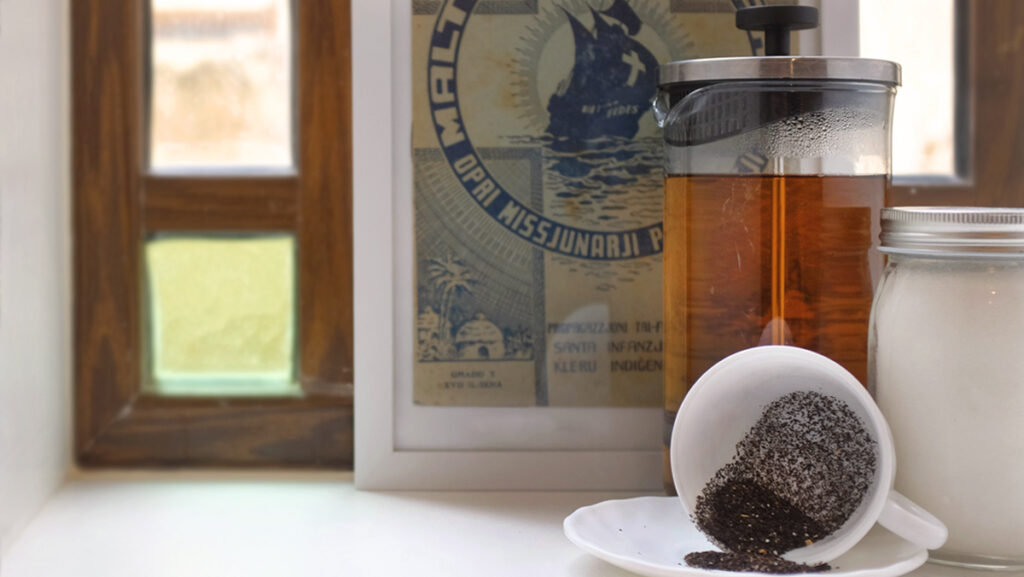
Table of Contents
- What You Need to Make Loose Leaf Earl Grey Tea
- What to Consider When Making Loose Leaf Tea
- How to Prepare and Make Loose Leaf Earl Grey Tea in 8 Steps
- Step One – Pick Your Earl Grey Blend
- Step Two – Measure Your Loose Leaf Earl Grey
- Step Three – Choose Your Brewing Tools
- Step Four – Place Your Earl Grey into a Teapot or Infuser
- Step Five – Add Hot Water
- Step Six – Steep Your Earl Grey Tea Leaves
- Step Seven – Pour and Strain
- Step Eight – Adjust to Taste and Enjoy!
- Loose-Leaf Earl Grey vs. Bagged Earl Grey
- Is it Time to Ditch the Tea Bag?
What You Need to Make Loose Leaf Earl Grey Tea
Preparing loose-leaf Earl Grey is simple.
All you need is:
- Hot Water
- Tea Leaves (Earl Grey, of course)
- Brewing Utensils (e.g. teapot, infuser, strainer)
- Tea Cup or Mug
You might also want to get your hands on a tea journal.
Why Take Notes
Taking notes as you go is an excellent way to keep track of your choices and figure out the perfect brewing method.
Use it to jot down steep times, brewing temperatures, measurements, and your opinions on different Earl Grey blends.
You can also use it to draw the tea leaves and compare what they look like before and after brewing for reference.
And best of all, you can look back on how your tastes and preferences have developed over time. What fun!
What to Consider When Making Loose Leaf Tea
While I’m sure you’re eager to get started. There are a few things to consider before you pop that kettle on.
Tea Base
Earl Grey is primarily blended using black tea. But sometimes green, white, or herbal tea leaves are used instead. The tea base will determine the brewing time, temperature, and even which vessel you should use.
Tea Grade
Just like the type of tea, the grade may have a bearing on the brewing method you choose. Lower-quality teas are often broken or smaller than higher-quality leaves. As a result, you’ll need to consider which vessel will best hold and filter your chosen tea. No one wants tea leaves in their teeth.
Tea Ratio
The good thing about loose-leaf over bagged tea is that you’re in control. You can check the box for guidelines. But ultimately, it comes down to preference, the vessel size, and the number of cups you’ll need.
Water Temperature
The ideal temperature depends on the tea base. Some Earl Grey blends can burn if the water is too hot. While others will remain weak and tasteless if not brewed at the correct temperature.
Steep Time
The amount of time you brew your Earl Grey is another important factor. Think about the prep time, how well the vessel retains heat, and how strong you like your cup of Earl Grey.
Brewing Method
Once you’ve decided on the above, it’s time to consider which brewing method is best for you and your tea choice. Will you stick to a traditional teapot and strainer? Go all-in-one? Or will you opt for an in-cup tea ball infuser?
How to Prepare and Make Loose Leaf Earl Grey Tea in 8 Steps
Step One – Pick Your Earl Grey Blend
French, Russian, Smoky, Aged or Classic Earl Grey. The choice is endless.
Whichever you pick, remember to check the size and quality of the tea leaves.
Whole, rolled leaves are best. But you can still brew smaller leaves with the right tools.
Step Two – Measure Your Loose Leaf Earl Grey
If you don’t own a tea scoop, start with one teaspoon of Earl Grey for every 250ml of water.
So that’s two teaspoons of tea leaves when using a teapot with a 500ml capacity.
Of course, some of this will need to be done by intuition.
For instance, 650ml teapots will need around two and a half teaspoons.
But ultimately it comes down to personal preference.
The better experienced you get, the more you can play around with the tea to water ratio.
Step Three – Choose Your Brewing Tools
When choosing a brewing device, there are a few factors to think about.
Size
This applies to the capacity of the vessel and the size of the leaves. Think about how many cups of tea you’ll need and how much room the leaves require. Not just to fit in the teapot (or infuser) but to expand, circulate, and brew. Also, consider how easy it is to store the device and how heavy it will be to pick up and use.
Material
There’s a large range of brewing vessels to choose from. And each has its pros and cons. When selecting a teapot, think about the durability, toxin leaching potential, heat retention, and heat resistance of the material.
Design
Modern, traditional, and downright crazy. Teapots and infusers come in all shapes and sizes. But it’s not all about the looks. There are a few design features to consider when choosing a brewing device. For example, whether it has a built-in strainer. Or, if you’ll need a separate strainer. Also, think about the shape, spout, handle, and lid.
Usability
Incorporating all the above, think about how practical the brewing device is. Will it pour easily, or spill everywhere? Built-in infusers are great. But, how easy is it to get to? And will it be easy to clean and reuse? Finally, do you need this for everyday use or special occasions only?
Types of Teapot
Traditional Ceramic
The best teapots come with integrated strainers. But if your teapot doesn’t have one, don’t panic! Just pop your tea leaves directly into the water. And once steeped, use a separate tea strainer. You can even use a sieve or paper coffee filter. This type of teapot is perfect for brewing 1-2 cups of tea. It’s more effort, but the ritual of pouring and straining the tea can be fun. Trust me, it’s worth it.
Modern
This style of brewing vessel typically comes with a large infusing basket. Try to avoid teapots that come with hidden plastic in the handle, lid, or plunger.
Cast Iron
Cast iron is excellent at keeping your brew warmer for longer. This type of teapot is best for an Earl Grey with a green or herbal tea base.
Clay
Typically used in Chinese tea ceremonies, clay teapots are very small. But they’re also good at ‘taking in’ the flavour of the tea. This means that you should use one teapot for every type of tea you brew to avoid cross-contamination.
Glass
If you want to watch the leaves as they unfurl, glass is best. Borosilicate glass is stronger and keeps in more heat, making it a solid choice.
Alternatively, you might consider making loose leaf Earl Grey with another brewing device.
Teapot Alternatives
Novelty and Ball Infusers
These can be tricky to fill and clean. They also don’t allow the tea a lot of space to infuse. As a result, it can take a little longer (1-3 minutes) for the tea to brew. However, they look nice and can bring a little more joy to a cup of tea. Ball infusers are ideal for a single cup of tea.
Pincers and Wands
Like ball infusers, these brewing tools lack capacity. They’re a little larger. But still too small for larger tea leaves.
Cloth Teabags
Organic, bleached, cotton cloth tea bags are affordable, easy to store, and completely reusable. However, some people argue that they can leave a taste behind.
French Presses And Plungers
Who doesn’t have one of these lying around? Also known as a cafetière, this brewing device is ordinarily reserved for coffee. But It also makes an excellent alternative to a traditional teapot. Perfect for the occasional loose leaf tea drinker who doesn’t want to invest in a whole new tea set. Just make sure you clean it thoroughly beforehand!
Step Four – Place Your Earl Grey into a Teapot or Infuser
Place the leaves directly into the teapot, built-in strainer, infuser, or cloth bag – depending on your chosen brewing method.
If your teapot doesn’t have a built-in infuser, make sure you have a strainer to hand.
Step Five – Add Hot Water
Following that, add hot water into the pot.
You should add in fresh water whenever possible. Water that’s been sitting in your kettle for a while may result in a flat brew.
For Earl Grey with a black tea base, a rolling boil (100°C) is a good brewing temperature to use. But this can vary.
Too hot it will taste bitter. Too cool and the tea will remain watery and tasteless. So it’s important to adjust accordingly.
Step Six – Steep Your Earl Grey Tea Leaves
Make sure that the tea leaves are completely covered with water. Then, let it brew for between three and five minutes.
Again, how long to steep Earl Grey depends on the tea base.
As a side note. You can usually re-steep the loose leaves several times.
So, over the next few hours, you can play around with the nuances and new flavours that reveal themselves with each brewing.
Step Seven – Pour and Strain
If you’re using something with a built-in infuser, this step is easy.
But if not, make sure you have a tea strainer to catch the loose leaves.
Step Eight – Adjust to Taste and Enjoy!
Add milk, honey, or lemon to taste.
Loose-Leaf Earl Grey vs. Bagged Earl Grey
Teabags are great. They’re quick, convenient, and easy to use. However, they do pose some issues.
Not only do they tend to contain lesser quality leaves. But the bags themselves may contain plastic.
And while you may not mind drinking a little microplastic here and there. The use of plastic makes it difficult to recycle that bag.
Of course, teamakers (like Clipper, English Tea Shop, and Pukka) are working hard to improve the environmental impact of their teabags.
But some companies are still lagging. And finding out which ones do and don’t contain plastic can be tricky.
Then there’s the rigidity of it all.
Unlike loose leaf tea, you’re limited by what’s in the teabag. And oftentimes, the ingredients can be a little vague.
The ritual of making a cup of bagged over loose leaf tea also loses some of its pageantry and splendour.
Plus, having whole, unbroken tea leaves generally make a better-tasting cup of tea – full of depth and multilayered flavour.
Is it Time to Ditch the Tea Bag?
So there you have it!
A simple guide on how to make the perfect cup of loose leaf tea.
Plus a few reasons why loose leaf Earl Grey reigns supreme.
And while there’s an enormous range of tasty bagged Earl Grey, you’ll soon discover that loose leaf is worth a try.
And if you’re still undecided, spend some time playing around with the options. You’re sure to find a brewing style that you’ll love!